Wednesday, February 27, 2019

NaMoPaiMo Side Project

One of my goals for this year was to have a side piece in addition to my official NaMoPaiMo Model. That is, there was going to be three others, but Sonya was the only one who got completed by Feb. 1st (minus her wings and hair, of course!)
 She's a Breyer Wind Dancer on the Brisa mold. I had designed her to be a Chestnut base Grey. Her emblem is clouds with a gold medallion which signifies Daydreams. Her name is loosely based off of the Spanish name, SoƱador, which means "dreamer."
 She has wings - I need to make them. Tomorrow is the last day of NaMoPaiMo, so I hope her wings (and mane and tail) to be completed.

"I Did It!"


 "I Did It!" Merida is Complete! 
 I had been so excited to start painting her all throughout the month of January, that I can't believe that February has already come and gone and I have completed yet another NaMoPaiMo model horse custom. 
 The one thing I learned through this year's challenge, was how useful a pin striping paint brush is for painting hair. You don't have to worry about your hand shaking too much with those super, tiny brushes. The brush holds more paint and allows you to curve around the tendrils of hair. 
It was certainly a wonderful experience!

Tuesday, February 26, 2019

Merida's Progress

 Merida has been progressing along nicely. There is several layers of pastels on her, but it is really difficult to see.
 I did her points with charcoal powder instead of black pastels. I actually found that out last year for NaMoPaiMo when I was painting a Grullo...and the black pastel wasn't "black" enough. It was a dark grey color. Charcoal is blacker than black.
 While I was working on highlighting the body, my cat decided she needed a lap to take her nap on. Thankfully, I was in a spot where I didn't need to get up anytime soon.
First coat of cream before adding white to the mane and tail. I did eventually add another couple of layers of pastels to the body to tone down the highlights..

Wednesday, February 20, 2019

NaMoPaiMo

It's hard to believe that NaMoPaiMo is almost over and I have been doing more painting than blogging! Anyway, it is a painting challenge hosted by Braymere Custom Saddlery Blog and has been going on for the past three years now. NaMoPaiMo stands for National Model Horse Painting Month and there are people worldwide who participate in this challenge! It isn't a contest because the object of the challenge is to gain skills while having fun. And you don't have to be a pro to participate! It is open for absolute beginners up to professionals.
 This is my first NaMoPaiMo model horse. She's my very first drastic custom and is a Stablemate G2 American Saddlebred Mare turned into a Blue Silver rearing Friesian (not a cross breed, but pure. The Silver gene, as well as the Cream gene, used to be present in the breed, but was bred out. Dr. Sponenburg has picture of (possibly) the last "Blue" Silver Friesian featured in his book, Equine Color Genetics 3rd ed. Blue Moon, her name, is based off of that photograph).
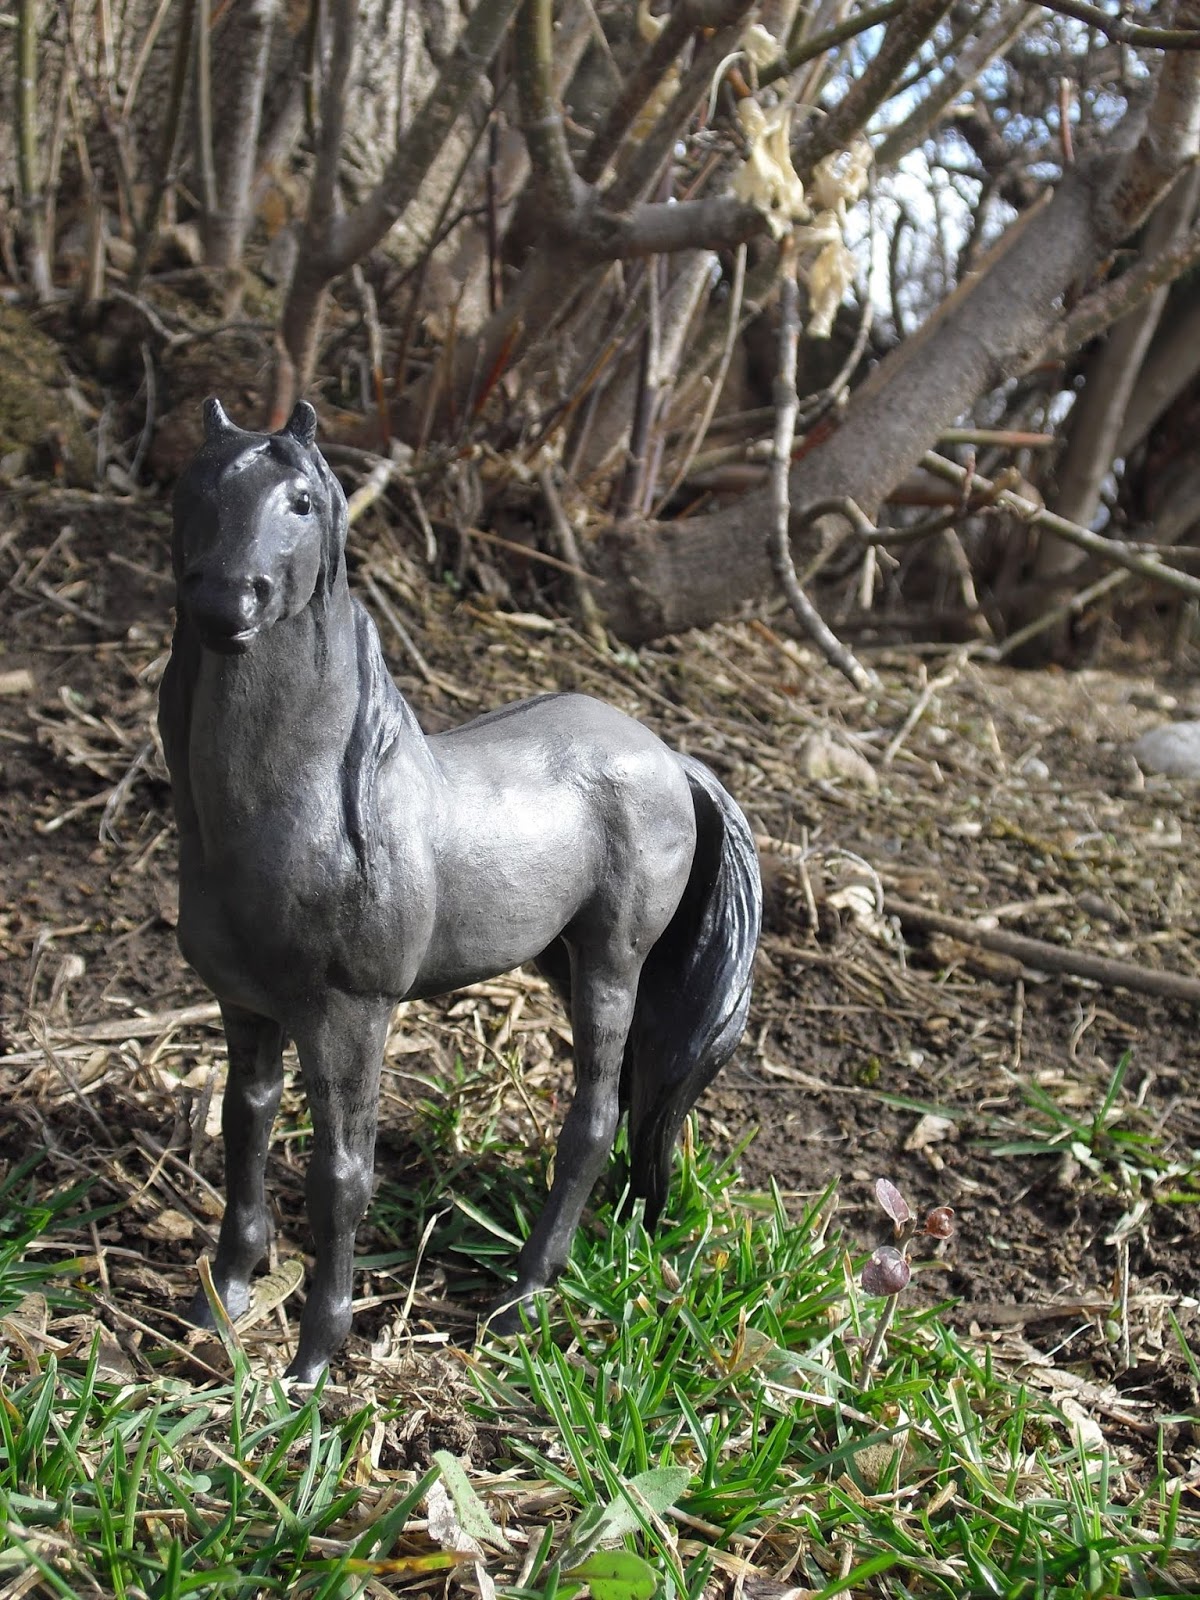
 Strider's my second NaMoPaiMo model horse. Like with Blue Moon, I was attending college during that time and needed something achievable. He's on my absolute favorite Breyer Classic mold, Mesteno (so customizing one to sell would be difficult in terms of parting). And he's a Grullo Kiger Mustang (...and he's Spirit, Stallion of the Cimarron's dad....).
 Since I have graduated from college, I became determined to do something a little bit more complex...OK, way more complex! In the past few years, I have become extremely fascinated with the traditional, fuzzy Shetland Ponies. So, why not customize a bunch? I did one and he won 3rd place in Sculpture at the county fair. But I had so much fun creating him that I had to make another one. And that's how I got my third NaMoPaiMo model horse.
 Her name is Merida, since I was affectionately calling her The Scottish Queen; but I already have an Ellenora (Eleanor - from Disney's Brave), so I couldn't call her that. This is after the dremel and heat gun stage. Note that the forelock is hollow (the tail is too).
 The non-water soluble expanding foam was used to take up space within the model. I still had to drill a hole in the tail to provide an escape for trapped air. In this picture, she looks like a lion with a top hat.
 Now she is a sheep.
 "I'm not a sheep. I'm a pony!"
 Primer stage.
And the first base coat. She's going to be a Zebra Dun, which requires a yellowish base. I'm going to add a few more coats before I start with the pastel process. I'll write about her and my NaMoPaiMo side model horse later.

Crazily Small

This is Topaz and he's a Paint Horse on the Breyer Mini Whinnie Sliding Stop Mold.
 The model is Tinker, from the Mini Whinnies Surprise Series 2.

 I used acrylic paint for his base coat before adding pastels to get the depth of color I intended.
 Here he is after his last layer of pastels. I don't remember how many layers I used. I'll remember to keep track for my next custom.
 The Pinto pattern is done with white acrylic paint (with too many layers to count also!)
The detailing is done with colored pencils - using both white and burnt sienna in the direction of the hair growth.
All finished! He's not the first Mini Whinnie scale custom I have completed, but he's definitely the most complex!


Just Getting Caught Up

I just thought I should probably get caught up with documenting the process of my custom model horses. So, the first one would be Speck's Peanut. 
 This is my original sketch.
 And the original model. He is Breyer's Zips Chocolate Chip on the Zippo Pine Bar mold. I did not buy him with the silver Sharpie lines - I added those to show where I wanted to make the "incisions" with the dremel tool (and I forgot to take a picture prior to that procedure!)
This isn't a great picture of him after the Dremeling stage (a gruesome process which is often horrifying to family members, friends, and other non-model-horse-customizers). But as you could tell - he doesn't look like the original sketch. The moment I "picked" his head up before attempting adjusting his neck...he...somewhat....formed himself - and I let him!
 Really? Who could resist such a curious and mischievous fellow?
 I ended up making a mold off of one of my other model horses' leg to make him four legged again. I also ended up fixing his shoulder after I had painted him (wish I had done that in this stage...could've saved on time and paint).


 Here's his base coat - before and after shading and highlights.
I designed him to be a Chestnut going Grey. He ended up a little whiter than I imagined, but that's okay...I really liked how his Dapples came out.

 Oh! And he's an Appaloosa, also! I'll talk about how I choose my colors in another post.
 Notice that some of his Leopard spots are greyed out and some are not. This is normal for Grey/Leopard combinations. The Friesian/Appaloosa cross, Mystic Warrior has spots like these.

All completed!

 I love this photo! It portrays his personality perfectly!
And a behind the scenes photo. I couldn't get him close enough to the cake while standing normal, so Paint Me A Pepto had to help with some leverage to get him in the right angle. The cats helped with clarifying scale!