Showing posts with label Peter Stone. Show all posts

Monday, December 5, 2022

Advent Model Horse Photo Challenge


So, fellow blogger and model horse artist, Feldman Studio, have been posting this photo challenge to her FB studio page this month. This kind of challenges have been in the model horse hobby for quite a long time (if anyone knows for exactly how long, please comment on this post)....and I'm pretty sure the first time I saw the first version was on Jennifer Buxton's Braymere Custom Saddlery Blog.

So,

another so,

to get back into consistently updating the blog, I decided to take up this challenge. . . on day 5.

Better late than never!


Day 1 - Palomino


All That Sass - Palomino QH Mare Breyer SM CM by Me - Sale Piece (still available! Contact me if interested!)

All That Sass' original name was I think supposed to be Anita, but when I "flipped" up the end of her tail - she revealed that she has a slightly sassy attitude! She was also my second Palomino I have painted ever, and the first Palomino sales piece I have created!

Day 2 - Peter Stone


Porter - Chestnut TWH Stallion OF Peter Stone RR Ginger Snap - Personal Herd Member (currently looking for a mate - super picky, though)

I got Porter at Sugarfoot Live for $25 because he was slightly damaged - which I was able to touch up and repair. He is my very first Stone Horse. Photographs so well that I don't really need to update his photo show halter picture as often as a whole lot of my other herd members! And because he photographs so well, he places high, too! (Which is like the top 5 placings even in larger photo shows). So super cool! Glad to have him in my herd!

Day 3 - Foal


Or more like Foals!

Strawberry - Palomino Quarab Filly OF Breyer TR Glossy Charity (Yes, you read that right!!)

Chip - Black Foal Coat Araloosa Colt OF Breyer TR Matte Spot

These two are my very first official Breyer herd members in my catalog of my overall herd (Chip is actually number 1 and Strawberry is 2). They were given to me for my 10th birthday by my aunt who also collected Breyers growing up and these two were actually apart of her herd, because my mom remembers getting [Chip] for her. They were also my very first Traditional scale Breyers. I have some Breyers from prior to that year, but I didn't know what they were at the time. I also remember being confused on scale due to already owning a couple of the Empire Grand Champion full scale toy horses which are roughly the same scale as Breyer Classics. So, it was like wondering who their parents were supposed to be when all the adult horses I had at the time were either the same size or smaller. I later found both of their parents at two different times at local antique stores, but that's a story for another time!


Day 4 - Curio Scale


Raja - Chestnut Tobiano/Sabino Gypsy Vanner Colt OF Schleich - Personal Herd Member

Raja is named after Disney's Jasmine's Tiger.
He's also I think my first Schleich....or is it Merlin...I don't know, it was too long ago!
Either way, Schleich and Safari Ltd. are roughly Curio scale and are smaller than the Breyer Little Bits/Paddock Pals models. They are also a little bigger than Breyer's Wind Dancers.

Day 5 - Roan

Ellenora - Strawberry Roan 3/4 QH x 1/4 Arabian Mare OF Breyer CL Western Riding Gift Set - Personal Herd Member (CuChulainn's mate and I'm almost done customizing her long awaited filly!!!)

I got Ellenora because she reminded me of someone's horse at church when I was in maybe Junior High or High School. I never met the horse because she actually had died from colic years prior. But our friend/the horse's owner showed me some pictures, told me about what they did together (barrel racing if I remember correctly), and distinctively told me what color she was: Strawberry Roan.

Nowadays, that term is no longer accepted as genetically correct - especially since it includes a food word. None the less, I still refer to this color as Strawberry Roan because of sentimental value while embracing newish or clarified terms.

Breed.

OK, why the halfish breed stuff.

Well, I'm not a big fan of Quarter Horses....or just bulky Stock horses in general.

So, when I got her, to me, she didn't look full QH due to her finer confirmation. Additionally, Breyer was hosting some photo contests and one had to do with Arabians in performance. Well, I didn't have any full Arabians, so I asked if entering partbreds were OK and they said it was fine. She never placed....probably because she looks more Stock than Part-Arabian, which is something I finalized later. But, yeah, that's why her breeding has Arabian in it!


Stay tuned for the next installment!

Let's just hope that it's a day-by-day and not a multiple days at a time!


Thursday, March 3, 2022

Hence The Reason I Don't Collect In Congas


Many people collect in different ways.


Some collect only one color
(I do not actively collect black horses, by the way)


Others collect only one type or breed
(I don't actively collect Decorators, either, but if one strikes my fancy, then I'll actually consider it).


And yet, the current popular way to collect model horses is to have every single color created on one mold. These are known as Congas.


Sure, it's pretty cool seeing how each color pulls out a different characteristic in the mold.


I mean, if I actively congaed anything, it would be the Classic scale Mesteno mold.
(I have a rule that I cannot do a custom to sell on this mold, because I would want to keep every. single. one. of. them!!)


Stablemates and Mini Whinnies are super easy to conga, due to being small, inexpensive, and the variety of molds (until recently) tend to be limited.
(I have tons of the same molds in the G2 Stablemates!)
(Yes, I absolutely love the SM G6 Magnolia, too!)


But, when it comes to the big guys....


They're all in doubles.
(Except for the TR Shetland Ponies! And we all know why that is!!)

So, how do I really collect?

Tariq & Omaira


Well, in families.

Blue-Eyed Bandit & Bev

Tyfon & Dungaree

Faith & Anthony

Rainfest & Lakota

Partly Cloudy & Sato

Some Couples have been around longer than others and are still waiting on a foal.

CuChulainn & Ellenora

Another long-time couple and they're going to be getting a foal this year!

Cascade & Drizzle

So, yeah, there's the family completion with a foal issue. There's also the stallion missing problem. For some weird reason, I have a ton of TR Pony and SM Mares.

Misty & Stormy

I know who I want to have as Wings, Stormy's dad - it's the Breyerfest 2013 SR Chincoteague Pony, Buckaroo. I've come close to getting him a couple of times, but it's either the model is no longer available, I'm out of money, or I don't have anything worthy of a trade.

Brighid & McKay

Brishin

But, the biggest problem I have, is the multitudes of Stallions.
Why?
Well, it's kind of obvious.
I like hair and action.
So, I tend to gravitate towards all of the macho looking stallions with their hair flying as they're just all vin' 'n' vinegar. 
(By the way, Brishin would be an awesome match for the TR scale Epona draft resin. I can totally see her standing there, looking behind at him and their foal, with the expression of: "Seriously? You're going to do that now?" While the foal is acting like the father).

Brighty

I do have plans for a perfect family photo for Brighty....but that means I need to another brighty mold to customize.

Xavier

Santiago

Khalid

Ansel Adams

Yeah, I knew what I was getting into when I got him. "I've already got so many studs who need mares and foals! I don't need another one!"
But, it was for sentimental reasons. And I'm glad I got him!


I do get sucked in and get the already family sets, only if I really like the models in the set.
(I'll talk about Buckeye in a later post).


But, this family is entirely pieced together by myself.


And, boy! Wintersong waited a long time for his family - I got him the year he was released in 2007!
(I had actually got Shadow before Groovy Girl, who I got last year).


In all of this, I know for sure that it would be an eerie day when every single family is complete.
I also know it won't last long!!

Tuesday, January 18, 2022

How to Sculpt an Ear with a Breathing Hole

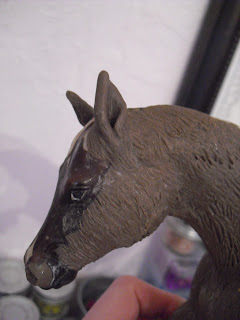
Shadow's extremely large breathing hole in her left nostril.

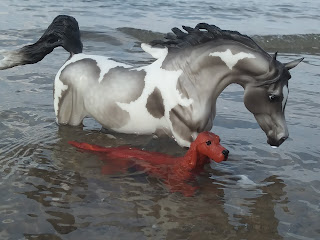
Typically, when customizing, artists will fill in the factory breathing hole that's located in the nostrils or the corner of the mouth and drill a small hole in the groin where it would be properly hidden. However, I like to place my models (OF and CMs alike) in water when I'm doing photo shoots at either a lake or a river.

Strider - CL CM


Which means...

Partly Cloudy & Emerald Isle - TR OF

the water level...

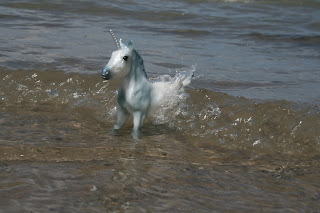
Drizzle - TR OF - Look at that Splash!

…can get pretty high.

So, having a hole in the groin makes me uncomfortable when envisioning the water level rising up through the hole and getting locked inside the hollow model - therefore, causing molding. 

That's when I started brainstorming on how to place a hidden hole in the ear. It actually didn't take me that long to figure it out, it was more of trying it out to see if it would work is why it took me so long.


Supplies:

Metal Needle Sculpting Tool
Cone Shape Silicone Blending Tool (these are used for oil paints)
Old Paint Brush for applying the Rubbing Alcohol
Two-Part Sculpting Material (Aves Apoxie or Magic Sculpt)
Rubbing Alcohol
Dremel w/ Diamond Bit Drill


First thing you need to do is drill a hole that's big enough to "find" during sculpting. Make sure it's in the correct location for the ear.

EDIT! Also have a larger hole in the belly or the groin, so that you can empty out any dried Apoxie that have accidentally broken off inside while sculpting. (Thankfully, the hole that I had already sculpted over has a layer of masking tape with the sticky side pointed inward to catch any little stuff that had dislodged over time).


It helps to sculpt one ear and let it cure before sculpting the other one. This enables you to not accidentally smash one ear while sculpting the other.


Once one ear is cured (this one is not one with a hole in it, by the way), carefully shape the  second one to be similar shape and size.


When folding the ear, keep it more open and poke the metal needle tool through what would be the ear canal.

Of course, I'm sculpting an ear that is pointed backwards! But, I'm sure this technique would work no matter which way the ear is pointed.

Carefully place the ear over the hole and mold it to the desired position.


Take the needle tool again and gently press the Apoxie to the sides of the hole.


Now, you need a small snake (a little longer than this piece) for the muscle around the ear.


And smooth it to the head and ear (use the silicone tool for blending to the ear). This helps prop up the ears - otherwise, they would lay over on the head funny and not look natural.


Now saturate the inside of the ear and smooth (and texture) it with the silicone tool. Also, continue to smooth out or texture the base of the ear to the head.


Congratulations! You have now made an ear with a breathing hole in it!!