
 |
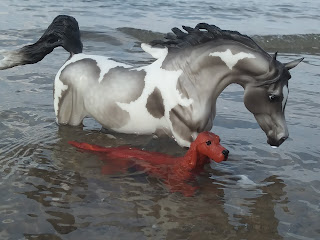
| Shadow's extremely large breathing hole in her left nostril. |
Typically, when customizing, artists will fill in the factory breathing hole that's located in the nostrils or the corner of the mouth and drill a small hole in the groin where it would be properly hidden. However, I like to place my models (OF and CMs alike) in water when I'm doing photo shoots at either a lake or a river.
 |
| Strider - CL CM |
Which means...
 |
| Partly Cloudy & Emerald Isle - TR OF |
the water level...
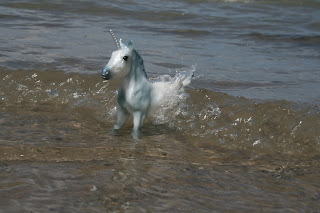 |
| Drizzle - TR OF - Look at that Splash! |
…can get pretty high.
So, having a hole in the groin makes me uncomfortable when envisioning the water level rising up through the hole and getting locked inside the hollow model - therefore, causing molding.
That's when I started brainstorming on how to place a hidden hole in the ear. It actually didn't take me that long to figure it out, it was more of trying it out to see if it would work is why it took me so long.

Supplies:
Metal Needle Sculpting Tool
Cone Shape Silicone Blending Tool (these are used for oil paints)
Old Paint Brush for applying the Rubbing Alcohol
Two-Part Sculpting Material (Aves Apoxie or Magic Sculpt)
Rubbing Alcohol
Dremel w/ Diamond Bit Drill

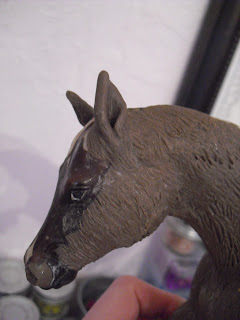
First thing you need to do is drill a hole that's big enough to "find" during sculpting. Make sure it's in the correct location for the ear.
EDIT! Also have a larger hole in the belly or the groin, so that you can empty out any dried Apoxie that have accidentally broken off inside while sculpting. (Thankfully, the hole that I had already sculpted over has a layer of masking tape with the sticky side pointed inward to catch any little stuff that had dislodged over time).

It helps to sculpt one ear and let it cure before sculpting the other one. This enables you to not accidentally smash one ear while sculpting the other.


Once one ear is cured (this one is not one with a hole in it, by the way), carefully shape the second one to be similar shape and size.

When folding the ear, keep it more open and poke the metal needle tool through what would be the ear canal.
 |
| Of course, I'm sculpting an ear that is pointed backwards! But, I'm sure this technique would work no matter which way the ear is pointed. |
Carefully place the ear over the hole and mold it to the desired position.

Take the needle tool again and gently press the Apoxie to the sides of the hole.

Now, you need a small snake (a little longer than this piece) for the muscle around the ear.

And smooth it to the head and ear (use the silicone tool for blending to the ear). This helps prop up the ears - otherwise, they would lay over on the head funny and not look natural.

Now saturate the inside of the ear and smooth (and texture) it with the silicone tool. Also, continue to smooth out or texture the base of the ear to the head.

Congratulations! You have now made an ear with a breathing hole in it!!
No comments:
Post a Comment