A few weeks ago, I was reading Braymere Custom Saddlery blog post revisiting a list of real horse things that some hobbyists would like to see in the model horse world. I followed the link featured in the post to an earlier post of the original list one particular hobbyist had listed. I don't remember reading this post before, but I'm glad I found it now. There were quite a few different horsey things that were listed. The one thing I found that I could make was the Memory Foam Saddle Pad made for English Saddle.
I was originally wanting to go to Joann's to get some thinner foam, but that didn't happen and I figured I'll test it with what I have. The fabric is a two way stretch fabric that I had originally gotten for an American Girl Doll Ice Skating Dress that I was going to make with my little sister for her birthday. It was a total flop, since I wasn't experienced enough sewing stretchy fabrics. As far as the saddle goes - that's a Breyer saddle. I had gotten it during a time when my mom told me that I needed to get some riders and tack before I got another horse (my favorite form of play was mustang herds traveling single file all over the house - who needs riders!). The saddle isn't great, the flaps don't lie correctly on the horse, and the girth isn't a real girth. But it'll just have to do.
As usual, all things must start with a pattern.
Cutting down the foam was interesting. Scissors didn't work whatsoever. I did reflect back to when I got the foam and the person at the cutting table used a kitchen knife to cut it. I ended up using the serrated blade on my pocket knife. I then used the scissors to even out the cut side.
Cut it to shape.
A little lumpy, but I don't think it would show once fabric is put on it.
Cut and pin two pieces of fabric. This would make a casing for the foam to fit into.
I had to look up what kind of stitch to use for stretchy fabric. The three lines of stitch marks is the symbol for the Stretch Stitch. Also, when using stretchy fabric, it is a good idea to buy a specially made Stretch Needle for your sewing machine.
I ended up needing to make the casing smaller (and it could be even smaller and rounder still).
Foam in...
And ready to sew up.
This is a cool stitch. I can't explain it successfully without pictures to show, so I'll have to write a post on that later. It is really helpful when sewing up stuffed animals whose seams burst open revealing a hole in their backs or bellies.
All done! It needs to be less square and shorter for the seat.
And the foam needs to be thinner. I might do a seam on the bottom next time, so that it sits on the horse properly.
However, the shape worked for the Western Saddle (another Breyer saddle - only with a customized cinch and rear girth).
Apparently, there are memory foam Western saddle pads available, but they are constructed differently than the English saddle ones.
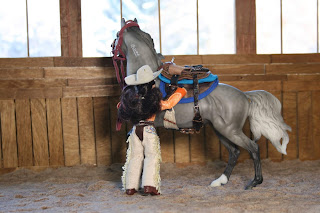
And because I don't like the saddle, I wanted to do an oops series. Hwin is frisky enough to be a bit of a handful for these two girls: Jenny (on Hwin) and Serena (trying to stop Hwin).
Oops! Jenny's fine, she's a rough and tumble kind of girl.
Note how the flaps stay elevated instead of laying flat on the horse.
Let's try the Western Saddle....will she cooperate?
Nope!
I don't know if I should try to modify this pattern with my existing saddle first or try to make a saddle and then the saddle pad. We'll see.
I don't know if I should try to modify this pattern with my existing saddle first or try to make a saddle and then the saddle pad. We'll see.


No comments:
Post a Comment